Show Day Checklist: Everything Your Band Needs Before You Hit the Stage

On this page
Why a Checklist Beats Memory
Show days are full of small tasks, and the one you forget (a dead battery, a missing power strip, a wrong load-in time) is usually the one that derails the night. A written checklist takes the guesswork out, so your band can spend its energy on playing well. Work through each section below, check things off, and hand the stage-ready parts to whoever needs them.
One Week Before: Advance the Show
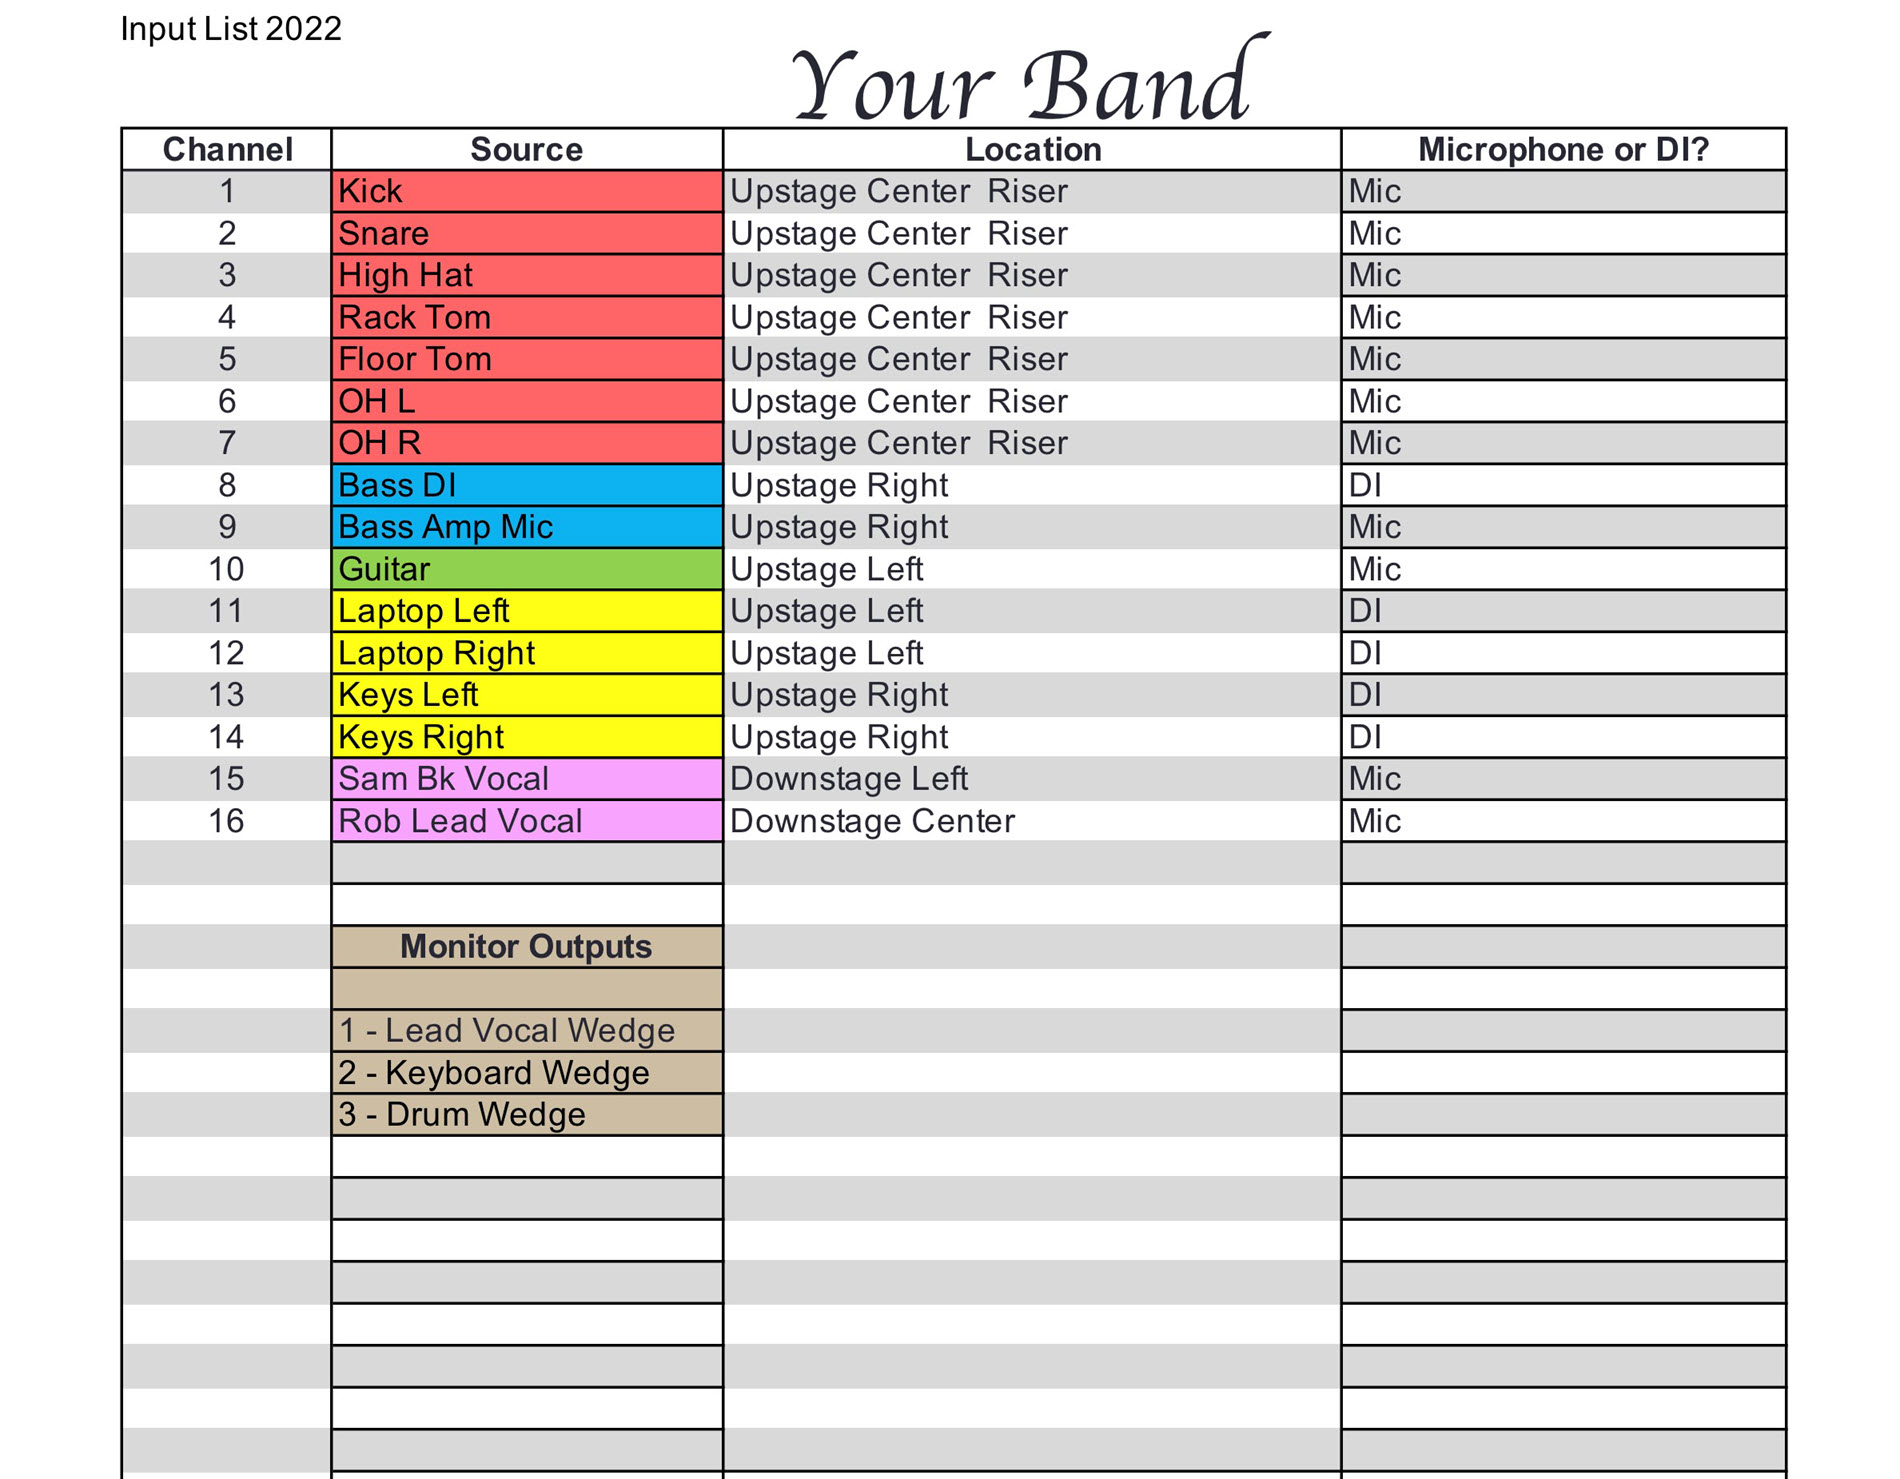
“Advancing” a show means confirming the details with the venue or promoter ahead of time. The two documents that help most are an input list and a stage plot.
An input list is a spreadsheet of every sound source on stage that needs to reach the PA (public address, or main speaker) system. It shows the instrument name, mixer channel number, and whether it uses a microphone or a DI (direct inject) box, a device that lets instruments like keyboards or bass plug straight into the mixer.
 Via hub.yamaha.com
- Build an input list: instrument, channel number, mic or DI
- Add a column for each source’s rough location on stage
- Note monitor needs (who needs to hear what)
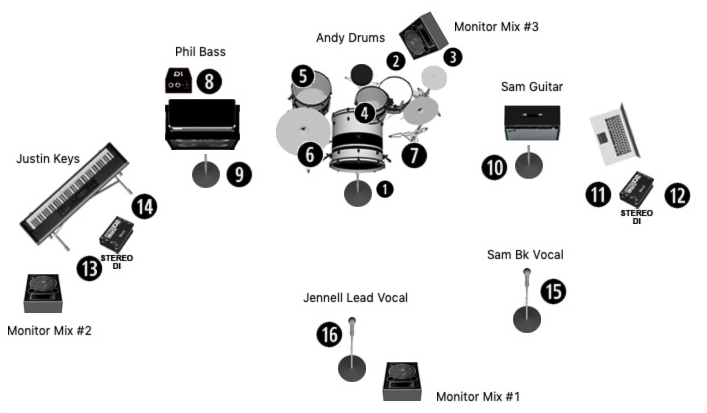
- Draw a stage plot showing where every instrument, mic, DI, and monitor sits
- Number mics and DIs on the plot to match the input list
- Label each position with the band member’s name
- Email both documents to the venue’s sound engineer
- Confirm set length, set time, and number of bands on the bill
- Confirm payment terms (flat fee, door split, etc.) in writing
- Ask what backline (shared amps or drums) the venue provides, if any
A stage plot is a simple drawing of your stage layout. Professional apps exist, but a hand-drawn sketch works fine. You may see the terms “downstage” (the edge closest to the audience) and “upstage” (the back, usually where the drummer sits).
 Via hub.yamaha.com
The Day Before: Gear and Logistics
Test everything at home, where a fix costs you nothing but a few minutes.
- Test every cable; set aside or label any that crackle
- Pack spare instrument cables and XLR (mic) cables
- Pack power strips and an extension cord
- Pack spare strings, drumsticks, picks, and drum key
- Put fresh batteries in pedals, wireless units, and active pickups; pack spares
- Pack gaffer tape (cloth tape that removes cleanly) and a small toolkit
- Charge tuners, phones, and any wireless gear
- Reconfirm load-in time with the venue contact
- Confirm parking and loading access (back door, alley, elevator?)
- Share the venue address and contact number with every band member
Load-In: Arrive Early and Set Up Smart
Arriving early gives everyone time to test mics, swap batteries, and check cables before things get busy. Staggering arrivals helps too. Having the drummer and bassist show up first lets drum mics get placed and tested without the whole band waiting around.
- Arrive at or before your confirmed load-in time
- Check in with the venue contact and sound engineer
- Bring a printed copy of your input list and stage plot
- Set up drums first, since they take longest and anchor the stage
- Let the drummer finalize kit and cymbal positions before mics go up
- Set up bass and guitar amps, then keyboards and vocal mics
- Run power and tape down cables to avoid trip hazards
- Test every cable and connection before soundcheck starts
- Confirm wireless mics and packs have fresh batteries
- Tune instruments so soundcheck reflects real show conditions
Soundcheck: Line Check to Final Balance
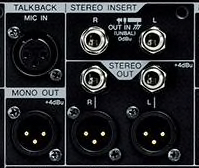
Soundcheck is your chance to test gear, set levels, and settle into the room. Many engineers use a talkback mic, a microphone at the mixing desk that lets the engineer at FOH (front of house, the main mixing position facing the stage) speak through your monitors.
 Via hub.yamaha.com
- Line check: play each input alone to confirm it reaches the mixer
- Play each instrument at true show volume while the engineer sets gain
- Don’t play louder at the show than you did at soundcheck (it throws off levels)
- Stay quiet when it’s not your turn; noodling slows everyone down
- Monitor check: each player asks for what they need in their wedge or in-ears
- Keep monitor requests specific (“more vocal, less guitar”)
- FOH balance: play a full song so the engineer can build the house mix
- Mark final stage positions with tape (amps, mic stands, pedalboards)
- If the venue uses a digital mixer, ask the engineer to save the settings
- Thank the engineer; they’re on your team
Pre-Show: The Last 30 Minutes
The doors are open and your gear is set. Now focus on yourselves.
- Print set lists in large type, one for each player plus the engineer
- Tape set lists to the floor or mic stands
- Tune every instrument right before going on
- Drink water and keep a bottle within reach on stage
- Place picks, sticks, capo, and slide where you can grab them
- Keep a spare cable and a spare instrument (if you have one) near the stage
- Switch phones to silent
- Agree on a start signal and who talks to the crowd between songs
- Use the restroom now, not mid-set
Post-Show: Wrap Up Professionally
How you leave a venue shapes whether you get booked again.
- Clear the stage quickly so the next band can set up
- Collect all gear; check under amps, drum risers, and in corners
- Count cables, stands, and small items against your packing list
- Settle payment with the venue or promoter and get a receipt if possible
- Thank the sound engineer, staff, and other bands
- Do a final walkthrough of the stage and green room before leaving
- Send a thank-you message to the venue or promoter within a day or two
- Ask about future dates while the show is fresh in their mind
- Note what went wrong (and right) to update this checklist next time
Sources
Tools of the Trade: Seven Ways to Ensure a Smooth Sound Check, Steve La Cerra, Yamaha Music (hub.yamaha.com)