Stage Monitors and In-Ear Monitors: How to Actually Hear Yourself on Stage

On this page
Why You Can’t Hear Yourself
The PA system, the big speakers on either side of the stage, is aimed at the audience, not at you. Good setup places those main speakers in front of the microphones, partly so they don’t feed back. That works well for the crowd, but it means you’re standing behind the loudest sound in the room. What reaches you is a blur of drum spill, bass rumble, amp noise, and muddy reflections off the back wall.
That’s why stages have monitors: separate speakers or earpieces that send a custom mix back to the performers. The engineer builds these mixes from aux sends, which are extra outputs on the mixing console that let each performer hear a different blend of the band from what the audience hears. Once you understand how monitors work, you can ask for what you need clearly and get it faster.
Wedge Monitors: The Classic Floor Speaker
A wedge is a floor monitor with a sloped cabinet, shaped like a wedge of cheese. It sits on the stage in front of you and fires sound up toward your head. Most small and mid-sized venues use wedges because they’re simple, rugged, and need no setup from the performer.
Typical placement: Wedges usually sit downstage of each performer. “Downstage” is the edge of the stage closest to the audience, and “upstage” is the back, where the drummer typically sits. The angle points the speaker at your ears, not your knees and not the ceiling. If you step out of that line, the wedge gets much quieter, so pay attention to where you’re standing during soundcheck and try to stay there during the show.
Placement also matters for feedback. Most vocal mics reject sound best from directly behind, so wedges are generally positioned in front of the singer, facing the back of the mic. If you wander around with the mic pointed at a wedge, you’ll probably hear a squeal.
 Via hub.yamaha.com
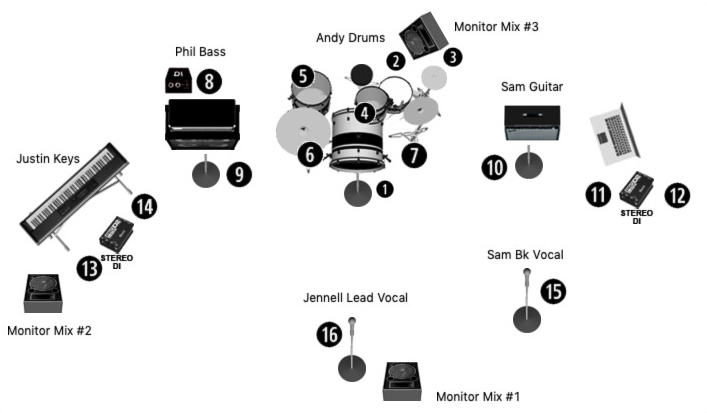
A stage plot, a simple drawing of where everyone and everything sits, should mark where your monitors go. Even a hand-drawn sketch helps the engineer put wedges in the right spots before you arrive.
What wedges are good for:
- Simple, quick setups and shared mixes. Two vocalists can share one wedge.
- Feeling the physical “push” of sound, which many players find natural.
- Bands that move around and don’t want anything in their ears.
The downside: Wedges add to overall stage volume, and that sound spills everywhere, including into other people’s microphones.
In-Ear Monitors (IEMs)
In-ear monitors are earpieces, similar to earbuds but built for performance, that deliver your monitor mix straight into your ears. They’re usually connected to a wireless bodypack receiver or a wired headphone amp.
How they help:
- Isolation. IEMs seal your ear canal, which blocks out much of the stage wash. You hear your mix, not the drummer’s crash cymbal bouncing off the wall.
- Personal mixes. Each player can get their own blend instead of sharing a wedge.
- Lower stage volume. With fewer wedges blasting, the whole stage gets quieter, and front-of-house (FOH) sound often improves too. FOH is the main mix the audience hears.
- Hearing protection. The seal also does some of the work of earplugs. Still, keep your in-ear volume as low as you comfortably can, and use musician’s earplugs whenever you’re not on in-ears.
Trade-offs to expect: IEMs can feel isolating at first. Some engineers place audience mics at the sides of the stage and feed them lightly into the in-ear mix so the band feels connected to the crowd, and that’s worth asking for. Some vocalists also find in-ears strange because they lose the physical vibration they get from a wedge, which can make their voice feel slightly disconnected.
When IEMs are worth it: IEMs make sense if you play loud stages often, sing harmonies that need precise pitch, use a click track, or keep fighting feedback. For occasional bar gigs, a well-placed wedge and a good conversation with the engineer may be all you need.
How to Communicate Your Monitor Needs
Engineers aren’t mind readers, and “more me” tells them almost nothing. Which part of you? More compared to what? Clear requests get fixed fast.
Unhelpful:
- “More me.”
- “It sounds weird.”
- “Can you just make it better?”
- Waving vaguely at the wedge mid-song.
Helpful:
- “Can I get more of my lead vocal in my wedge? Nothing else.”
- “I’m hearing too much keyboard. Can you pull it back in my mix?”
- “Can I get a little kick and bass so I can lock in with the rhythm section?”
- “My vocal sounds dry. Can I get a touch of reverb in my monitor?”
- “There’s a ring around my vocal mic when I sing loud.”
Good requests name the source (what you want changed), the direction (up or down), and the destination (your wedge or your in-ears).
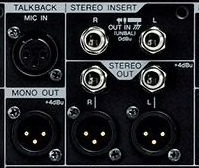
During soundcheck, the engineer may talk to you through a talkback mic, a dedicated microphone at the console that is routed into your monitors. Make sure you can hear it and respond to it.
 Via hub.yamaha.com
During the show you can’t talk to the engineer, so agree on hand signals at soundcheck. Pointing up or down plus pointing at the instrument is a common approach.
Why “Turn It Up” Is Often the Wrong Starting Point
It feels logical: you can’t hear, so ask for more volume. But loud monitors cause real problems.
- Spill. Sound from a loud wedge leaks into nearby vocal mics, so your monitor ends up in the house mix. That muddies what the audience hears.
- Feedback. Every increase in wedge level brings the vocal mic closer to feedback, the loop where a mic picks up a speaker playing that same mic.
- Escalation. Your wedge gets louder, so the guitarist turns up, so the drummer hits harder, and soon nobody can hear anything.
A widely repeated rule in live sound is to keep monitors as quiet as possible. Often the better fix is subtractive: instead of raising what you want, lower what’s in the way. If you can’t hear your vocal, asking for less guitar in your wedge may solve it without adding any volume. Moving the wedge, or moving yourself back into its line, can also work better than a level change.
Setting a Starting Mix
Build your monitor mix in layers rather than asking for everything at once.
Ask for first:
- Your vocal if you sing. Most performers rely on vocals as their main reference, and many engineers start the monitor check with vocals for that reason. Vocals are often the loudest thing in a monitor mix.
- Yourself, if your instrument isn’t loud enough acoustically on stage.
Add gradually, only if needed:
- Timing references such as kick, snare, or bass.
- Other vocals for harmonies.
- Effects like a little vocal reverb.
- Audience mics, if you’re on in-ears.
Then play a full song together before changing anything else. A mix that sounds thin with one instrument often fills out once the whole band is playing.
 Via hub.yamaha.com
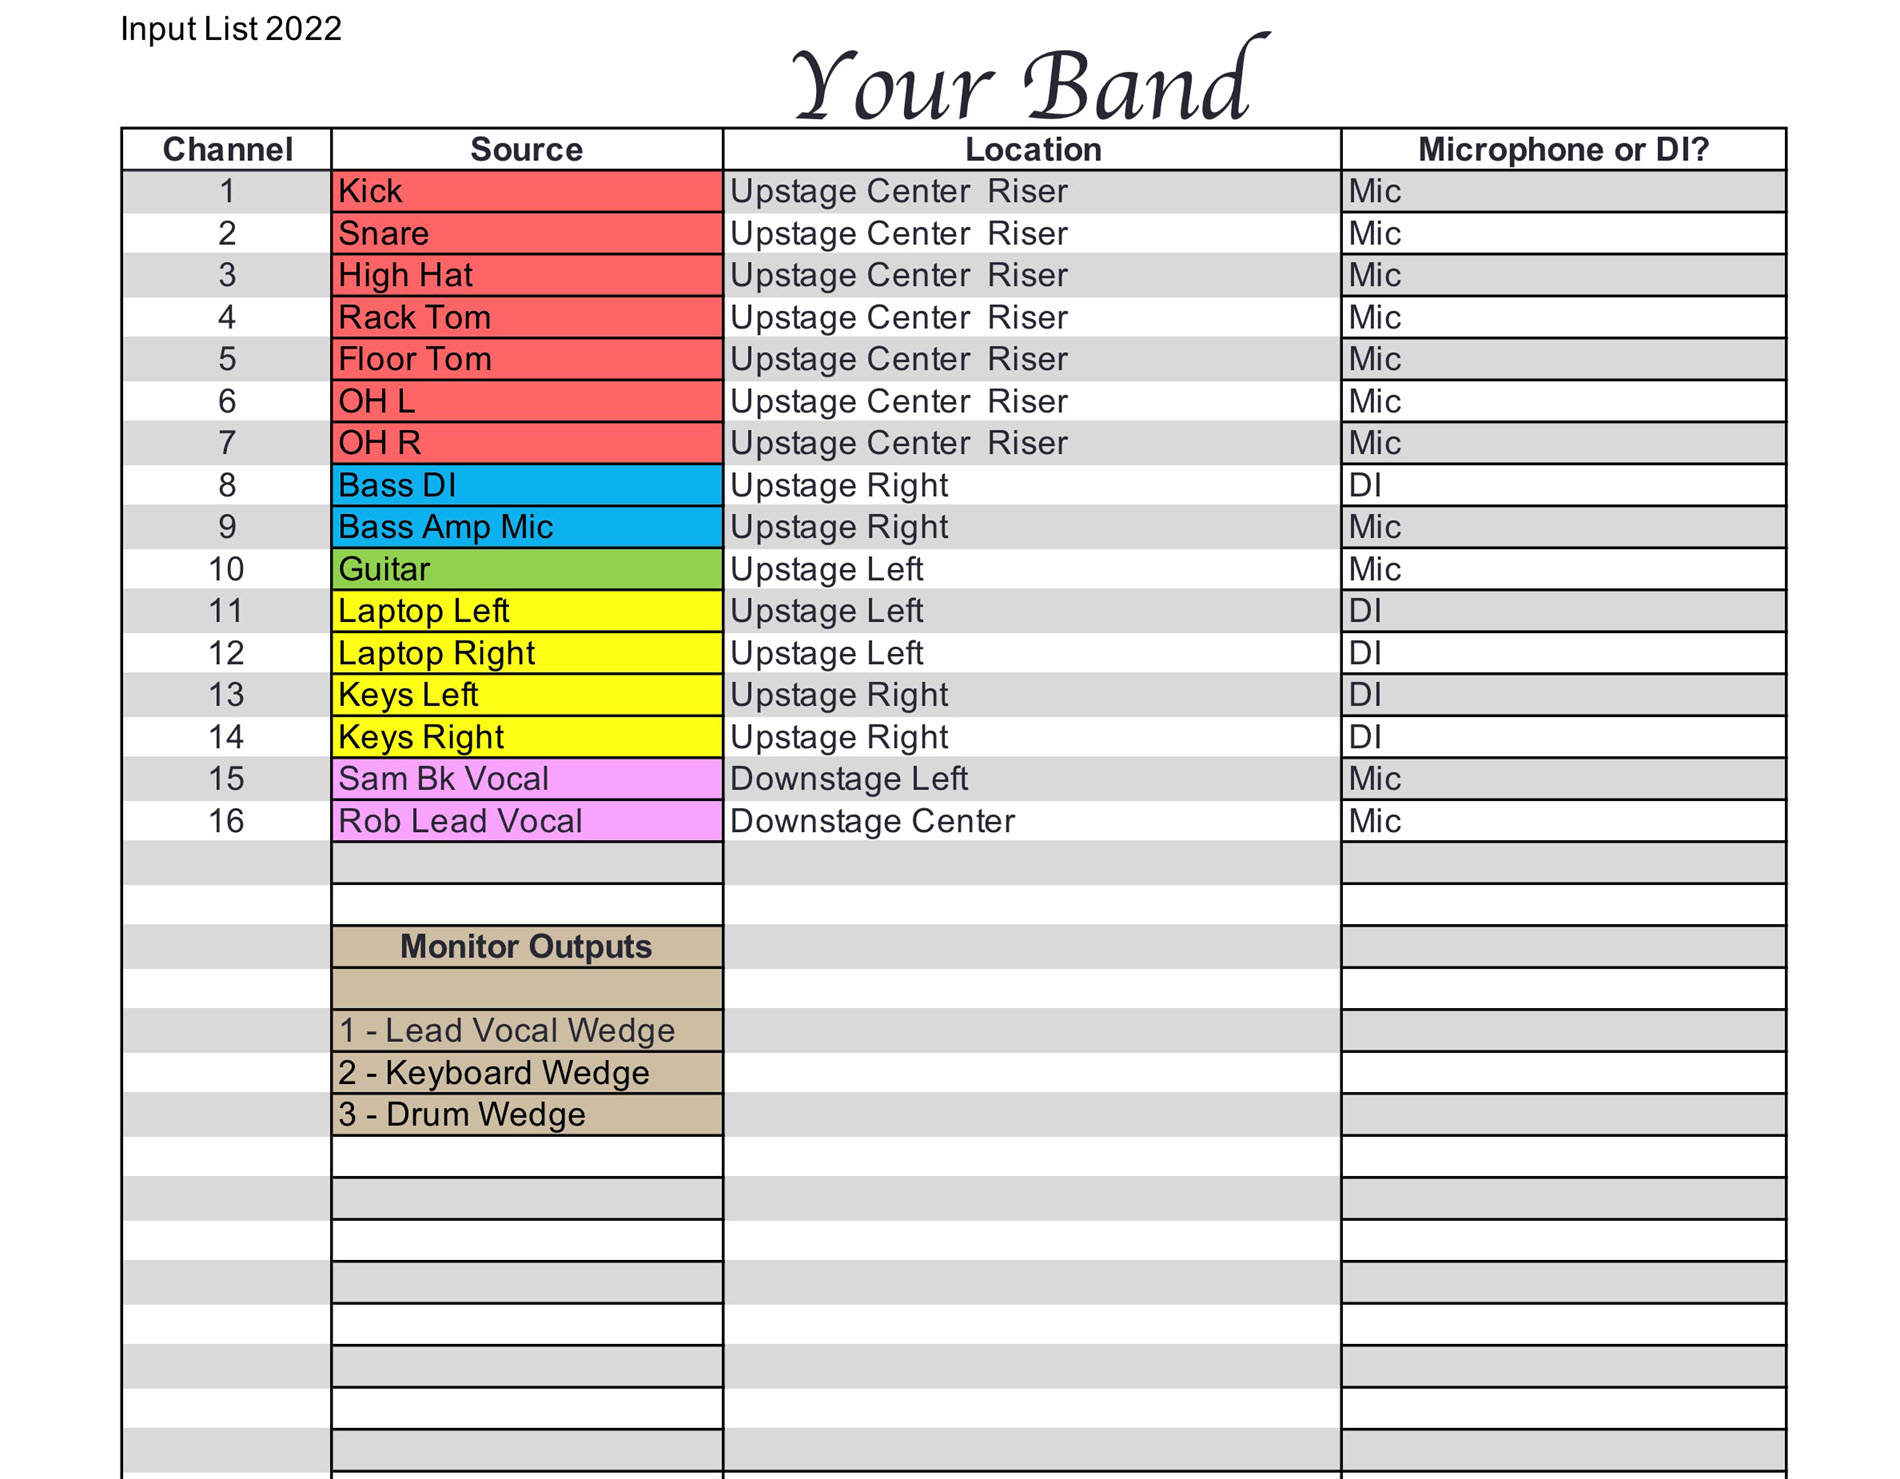
You can do much of this before you arrive. An input list is a simple spreadsheet of every instrument, mic, and DI box your band uses, and it can include a section for each player’s monitor needs. A house engineer who has never met your band will appreciate it, and soundcheck will go faster.
Sources
Strategies and a Suggested Standard Operating Procedure for Soundcheck, Christina Masha Milinusic, SoundGirls.org
Live Sound Guide: PA Systems, Mixing and Monitors for Gigs, Violet Recording Editorial Team, Violet Recording
Tools of the Trade: Seven Ways to Ensure a Smooth Sound Check, Steve La Cerra, Yamaha Music (hub.yamaha.com)